
Every time I'd cut up a men's shirt and lay the sleeves out flat, I'd marvel over the amount of fabric it takes to wrap up two arms. Just looking at the shape of one of these big sleeves, it seemed to echo the shape I would expect for a shirred bust bodice -- then I'd use the shirt front and back as the dress front and back. A few months later, I picked up Simplicity 2902 and laid the pattern pieces on top of the largest men's shirt in my stash; there wasn't enough fabric for this pattern. As always, there are lots of ideas and only so much time, so I put this on the backburner in the R&D department.
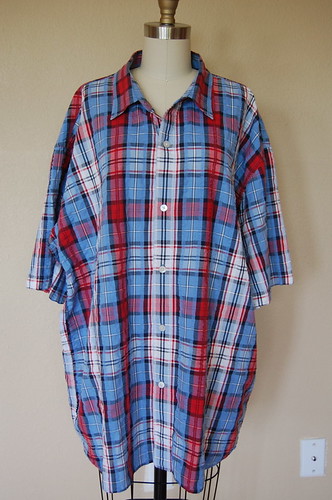
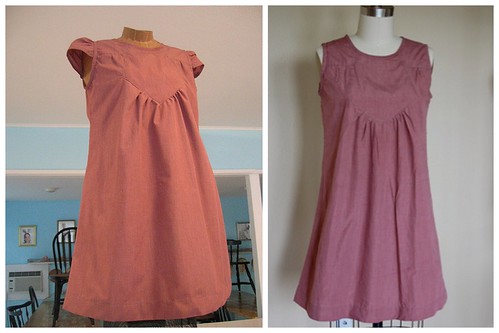
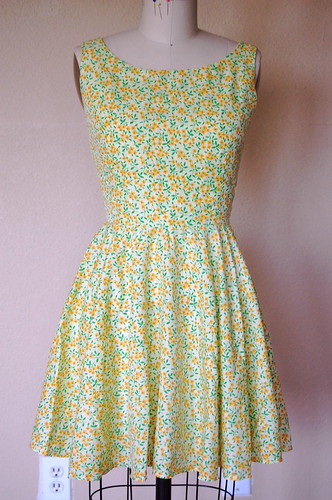
 Front view, as modeled by Clementine.
Two days I ago, this idea made it back to the front burner, and I cut a men's size XL shirt, 100% cotton seersucker, and draped this babydoll dress right on Clementine.
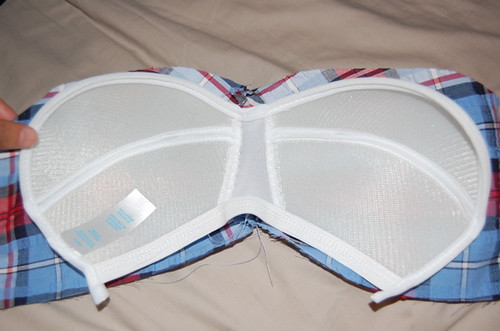
I had most of the dress done in a couple of hours -- it was fast! This bodice style does not lend itself to standard undergarments. Despite my *ahem* diminutive upper body, I feel most comfortable wearing a bra when I am ready to face the day. That's just me. So I took a Hancock break before sewing the bodice lining and evaluated their offerings for built-in bra inserts, which I've never used before. They had an impressive array of options. The "fits cup size A/B" versions were automatically out of the running, and the only "full bra" option was this one:
In the store I'd worried that the sew-in directions would be so complicated I might be frustrated, but as you can see, when I got home I discovered that the bra insert is actually bigger than the bodice front piece. So I dropped the bra insert idea, at least for the time being, and finished construction on the dress.
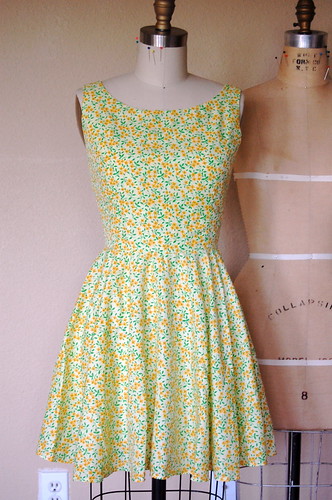
Front view, as modeled by Clementine.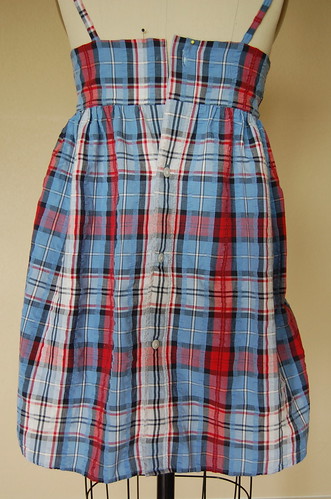
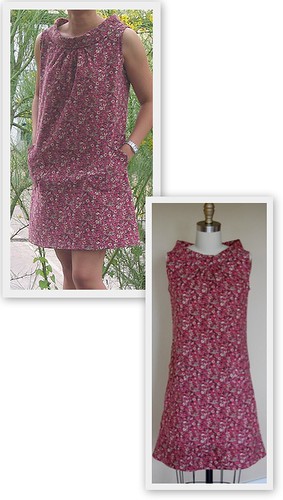
And the back view. Remember Clem's bust is a full inch larger than mine, when I'm wearing undergarments.

Me wearing the dress. It's comfy, though I still don't feel... protected up top. I'll probably buy some inserts or something, or make my own sew-in bra from some poly batting and bias tape.
Obligatory detail paragraph:
- I did not cut and re-shape the skirt part of the dress and re-sew the sides. The width of this dress is the exact width of the original shirt.
- The front of the men's shirt became the back of the dress so that the placket would be functional. I just had to add a buttonhole to the back band. (Now I need to sew on a button, haha!)
- Draping shirred pattern pieces never goes quite the way I think it will. It looked just right pinned on the form. Cut everything, gathered the fabric with thread, put it back on the form, and it was too big. There's another gap in my draping education to fill.
- I never know whether there will be quite enough length for a refashion to qualify as a dress. I thought this one would be a top, for sure, but it really is long enough! I ended up sewing the shirt placket from the second button from the bottom all the way to the bottom hem.
- I was able to match the pattern for the gathered front bodice, but after sewing in the gathering, it was harder to line up than I thought. This was one of those moments I thought I might unpick the piece and work really hard to align them. Then I decided I needed to get over it and get on with it. So it doesn't look very neat but this is the nature of research and development and trial and error, I guess.
- There was a lot of fabric left over -- the entire back yoke from the original shirt is still intact. This really surprises me! I'm thinking about adding some more random straps, you know, cause I really need the extra support. LOL

This is my optical illusion: If you stare long enough, the outwardly bending plaid design convinces you that contents are larger than they appear! ;)
It is a very easy dress/ top to just make up as you go along, and thus prob. an ideal tutorial garment. I'm just not 100% confident I can explain and photograph the steps very well... It's also very possible that one sleeve is not enough fabric to cover another woman's "dirty pillow" (I can't resist the chance to throw in that gem from Carrie). Note that one short sleeve gave enough fabric to cover both of mine! Hahahahahahahaha!!!
*crickets*
My thought is to try this on a larger form for a reality check, to see if a tutorial makes sense after all.
So, maybe another men's shirt refashion tutorial? Just in time for a beautiful spring. In Australia and New Zealand. Have a great weekend, everyone!


