Showing posts with label tutorial. Show all posts

01 January 2012

216. Happy New Year! Norma Envelope Clutch - free pattern

Happy New Year!!!  New Year's Day is my favorite holiday!  But how would you know or remember that, given my propensity toward semiannual blog updates?  I plan to blog more frequently in 2012.  I've missed sharing my sewing exploits, and I have talked myself out of posting some patterns and tutorials for silly reasons.  This year, I'll just put it all out there and maybe it will be of use to someone, somewhere in the world, just when they need it.


First up in the new year is a free pattern and pseudo-tutorial (you'll see what I mean in a moment) for an envelope clutch.  I was OBSESSED this summer with sewing pleather, and faux suede, and other new-to-me fabrics, and I was digging the envelope clutches all over street style blogs and Pinterest.  I'm comfortable sewing clothes, so putting together a bag has never been a technical concern.  But when it comes to bags, there are often curves and proportions that look better when they're planned, and not made up on the fly.

I drafted a pattern and sewed the first prototype for this envelope clutch in October, and when I took it out one evening, my friend Norma gushed.  Norma has a very strong sense of personal style -- a way of looking appropriate and trendsetting and fashionable -- and I could not have been more surprised how much she liked the clutch!  I had to make her one for her recent birthday, and name this in her honor.  :)


Download the Norma Envelope Clutch Pattern here.  And the brief pseudo-tutorial follows the jump.

26 February 2010

191. Read All About It! Newsboy Cap: Free Pattern + Tutorial


Being invited by the ever-creative Dana to participate in Celebrate the Boy month gave me an opportunity to revisit one of my favorite topics: my 6-year-old son's head.  I've traced the story back to labor: I checked into the hospital when I was 6 cm dilated, at which point the doctor remarked that, based on my baby’s head size, the baby would weigh at least 8 pounds. I was stunned and scared! Hours later I was surprised not only by my baby’s gender (BOY) but also by his 8-pound baby head on a 6-pound baby body.  Mmmm hmmmm.

After the initial head pointiness from that trip into the outside world, my son’s head bounced back into admirably round form.  It has always been enormous, enormously round, and an enormous source of pride for me, with its glossy, healthy hair and housing the most amazing, wondrous brain!  Sometimes I am allowed views into the brain in that head, with thoughts both fantastical (“When I grow up I am going to buy my own chocolate factory”) and mystifying (“If I had a turtle, I would punch it in the face”).

I will always remember his first store-bought driving cap, allowing me to Celebrate the Enormous Head.  Given that, it was exciting to be invited by Dana to participate in Celebrate the Boy and find a way to share the joys of adorning our beloved boys' heads.  When I read that newsboy caps were traditionally made of 8 panels, I scoffed at the wimpiness of the commercially made 6-panelled caps, and I vowed that our handmade caps would return to the illustrious glory of 8 panels. Don’t our boys deserve that???

Of course they do, but after drafting from scratch and sewing three total samples to get to this point, I only have a cap pattern to offer for ages 6-8.  Tiny changes in the pattern make a big difference, and I need more time to grade and fit for smaller heads.  So stay tuned for a cap pattern I'll share in the future for ages 2-4 or something like that.  Or, if you're brave and try your hand at grading it for other sizes, please let us know where we can download your version.

Keep reading for the Read All About It! Newsboy Cap: Free Pattern + Tutorial.


24 February 2010

190. Wednesday Workshop: Simple Sweatshirt Recon

It has been a busy and a bizzy February!  I just got back from a short trip to New Orleans, and I had not seen the city since Hurricane Katrina in 2005.  I didn't visit the Lower Ninth Ward or go on a self-guided photo tour of other areas that had been ravaged by Katrina, because I was working a lot and, in between, nursing a cold in the comfort of my hotel room.  Still, it was good to see spirits so very high.  The French Quarter was bustling and all outward signs say ongoing recovery.  Esp. with the recent Saints Superbowl win.  WHO DAT?!

I have thought a lot about sewing but don't have much new clothing to show for it (but lots of crafting!  I'm just not used to blogging those crafty projects...).

Well, I have one new garment to share.  After the sad news of Alexander McQueen's untimely death two weeks ago, I felt a little down and knew the best way out was to start one of the many sewing projects in my mental queue.  Behold: the simple sweatshirt reconstruction.


09 September 2009

172. Wednesday Workshop: Bikini Undies to Boy Short Undies

People, I am not even kidding! This is part 3 of 3 in a comprehensive exploration of sewing your own undies. This weekend I saw another $7 escape my life forever as a pair of nylon boy short undies from Target bit the dust, after maybe 20 wears. Never ever ever again. That was $7 that could have bought a month's worth of coffee, or a matinee ticket to The September Issue or Coco Before Chanel, or 3 jars of Nutella, or a yard of decent fabric. I'm not buying undies anymore, mark my words.

Here's my completed boy short version. You know I don't shy away from the colorful and bold when it comes to the undies:


It has actually been 2 weeks since my last Wednesday Workshop post. Things were quite busy 2 weeks ago with my training work, and I couldn't get my head around converting those bikini pattern pieces into boy shorts. I knew it could work... just took me some time to get in the right mindset to figure it out. Here's the good news: it might take 30 minutes to draft the pattern, but if you've sewn up the bikini panties from two weeks ago, putting these boy shorts together will take 15 minutes. Here's the Flickr tutorial:


This concludes the undies workshops! A few notes after wearing the three prototypes:
  • I've tried elastic casing, sewing regular elastic right on the fabric, and sewing a lingerie elastic with a picot edge right on the fabric. The most comfortable so far, which happens to be the easiest to me, is the lingerie elastic with the picot edge. I used it on the boy short undies, it is very comfortable against the skin, and it has just the right amount of give and stretch. A package of this (enough for one pair of boy shorts) was $0.38 -- yes, 38 cents -- on sale, but at regular price was $1. Worth every penny.
  • I will try two more kinds of elastic on future undies: the legendary fold-over elastic, as suggested by Johanna Lu, and elastic lace, which I had a hard time finding locally. I think the elastic lace will do a better job of hiding pantylines. If you have worked with these or end up using these in an undies project of your own, please let me know what you think.
  • The hipster undies were originally sewn with the leg hems just turned under and sewn with a zigzag stitch. This did not wear well -- the leg openings (predictably) stretched with wear, and more than I was comfortable with. I will probably sew a 1/4" elastic on this pair. But hipsters are not my favorite style of undies to wear, so I doubt I will sew them again.
  • I suspect that you can draft the boy shorts pretty easily without converting a pattern. But I'll save that experiment some other time. I'm burned out for now exploring undies.
A Flickr user asked me how sewing your own undies is more economical. Let's calculate the cost of 10 pairs of undies I've bought in the last year, several of which are already falling apart, at an average of $6 per pair: $60. I can get 4 pairs of boy short undies (which use the most fabric of all types) from a yard of 60" wide cotton jersey. Let's say that runs $6 a yard, so for 2 1/2 yards I'd pay $15. Plus 10 packages of elastic for a total of $10. Including a spool of thread for $2, that brings my monetary investment in self-made undies to $27 for the same 10 pair.

What about the time investment? I've invested about an hour of pattern drafting time and 15 minutes per pair of undies, for a 3 1/2 hour total time investment. When I purchased the last 10 pairs of undies, I probably spent more than 3 1/2 hours hemming and hawing over how much longer I could use the tattered and torn undies I had, driving to the store, trying them on over my undies in the dressing room, thinking about how poorly some fit or how uncomfortable they were while I was wearing them, and dropping to the ground to curse the heavens when some of them started falling apart within a year.

So the undies are done and it's time for a new project! Any ideas for upcoming Wednesday Workshops? I have a short list of experimental DIY kinds of projects, but am open to suggestions. :)

26 August 2009

170. Wednesday Workshop: Bikini Undies to Hipster Undies

Last week, Gattolina responded to my Wednesday Workshop tweet/ post on copying your own undies. The pair I chose were bikini-style undies and she asked for suggestions for hipster or boy short-style undies. So I decided to try converting the bikini undies pattern to hipster panties. The short story is that is was very simple to do. The longer story is that so much depends on your style, preferences, etc. I grabbed two pairs of hipster-ish undies to study them more closely:

The top pair are from AE, and they are probably a size too small. They are more bikini than hipster, but the leg openings offer much more coverage than a bikini. The waistband and legbands are elasticized, and the casings are sewn from a coordinating solid knit. The bottom pair are from Target. I think the center front and center back seam are a big mistake, though they obvz do lend some, well, definition between the cheeks. There is no elastic at the waist or in the legs -- the raw edge was turned in and coverstitched.

Two extra notes: From a design perspective, the leg openings on hipsters are much lower than on bikinis. And these undies are made of 94% cotton, 6% spandex, which have so much more stretch than 100% cotton jersey that they are tiny and have negative ease. I worked with the remains of the kelly green t-shirt from last week's Wednesday Workshop, so here's how to modify the bikini pattern without adjusting for negative ease:

I decided to lengthen the side seam for a total length (incl. seam allowances) of 5". I suspect this will be longer for taller folks. Then I used my french curve ruler to connect the bottom of the new side seam with the point where the panty front will meet the crotch piece.


Then I lengthened the side seam on the panty back to the same 5" as I did on the front. I drew a line connecting the bottom of the side seam to the bottom of the pattern piece using my hip curve.


And I sewed the waistband with elastic and did a simple hem at the legs.


Original vs. new DIY pair. I know the new ones look huge, but they do fit. Not sure about the non-elasticized leg openings though. I'll test them out and let you know. I also don't have any shirts to cut up that are knit w/ spandex but I'd like to modify the pattern with negative ease and a stretchy fabric to see if they are more comfortable, etc. Stay tuned for the next Wednesday Workshop....


19 August 2009

166. HBD and Wednesday Workshop: Sew Your Own Skivvies Tutorial (Refashion 28: Panties from T-Shirt)

1. Happy Birthday
I read a Chanel biography a few weeks back and noticed her birthday was fast approaching. Today's the day. Happy Birthday, Mlle. Chanel.

2. Sew Your Own Skivvies Tutorial
I've been mulling over sewing my own underwear for a long time now but didn't want to buy a bunch of patterns that I would have to modify for best fit. So I deconstructed a pair of my all-time favorite, on-their-last-leg panties and copied them. The original panties were regular 100% cotton jersey so I used a t-shirt in excellent condition to refashion into my new panties.

Of course, I took photos in case it might help anyone heading down a similar path, and I posted a Sew Your Own Skivvies Tutorial on Flickr:


To view and sew along from right here, click play above, then click on the fullscreen icon. When the fullscreen slide show comes up, you can press pause at the first slide, then click Show info in the upper right, and all my notes will came up in this translucent window.

3. Wednesday Workshop
My "day job" title is corporate trainer and business consultant, and it's always in me to share and teach what I learn when it's appropriate. This week I'm kicking off a blog series called "Wednesday Workshop". I'd like to post something every Wednesday -- might be an idea, a peek into a fast-and-furious DIY project (might not necessarily be related to sewing), a link to someone else's cool idea or project, or maybe a full-blown tutorial. It will probably be related to sustainability in some form or fashion... sustainability is on my mind all the time... thanks for letting me share. :)

12 June 2009

147. You like the tutorial. You *really* like the tutorial!

Hello again from Las Vegas!


Forever and two days ago, I put together a men's shirt refashion tutorial in Flickr. It seems like forever ago because it's been really busy the last 3 months, and I haven't passed on to you links to other refashioned garments that resulted from that tutorial. So, at long last, here they are. Please click over to these great folks' blogs and leave some love as you feel it. After all the ideas and inspiration I've found on the Web, it's nice to know I've started paying it forward in some small way.

[BTW: If you shared your creation with me and I haven't listed you below, it's because I have been flaky and am not keeping track of your updates very well! If you can excuse my flakiness and leave me a comment here with a link to your project, I will post your project soon with a link to your tutorial-inspired refashion.]

In order of notifying me of their brand of refashion coolness and hotness:

  1. Allison of Heinous Shrew
  2. Rachael at Benbo Loves You
  3. Zaza at DU-MAN (with a tilde over the n... how to do this on my keyboard...?)
  4. Interrobang
  5. Christine L at Kale and Clover

And FYI, I don't sew little girls' clothes, but now I'm inspired to! These are all over the blogosphere but in case you haven't seen them yet, check out Dana's men's shirt refashions for girls. Warning: cuteness factor off the charts.

04 March 2009

117. First Men's Dress Shirt Refashion Tutorial!

I have to admit that this photo tutorial was kind of fun to put together in Flickr.  :)

I got really good results viewing the tutorial when I clicked play below, then clicked on the fullscreen icon.  When the fullscreen slide show came up, I pressed pause at the first slide, then clicked Show info in the upper right, and all my notes came up in this translucent window.  I could go to the next step or back on my own from there using the intuitive navigation.  I think if I were following someone else's tutorial this Flickr slideshow would be perfect for me, the visual learner.

Please TOTALLY tell me what you think!  Leave me comments here or in Flickr comments, but let me know!  I am very curious, as a professional trainer, if I did a good job translating my skills to this photo tutorial environment!  :)  And especially if you sew this up, send me a link to your shirt.  More editorial notes are underneath the embedded slide show if you are so inclined to read...  So here's the tutorial.


I'd been dreading the thought of creating this photo tutorial in Blogger, and my fellow Blogger users know what a treat it is to add, resize, and caption many photos in one blog post! Luckily, I came across a Flickr photo tutorial by a really neat refashionista who operates as Outsapop. She is from Finland, so extra-cool points there.

Also, my original intent was to make a an empire-waist shirt like the 
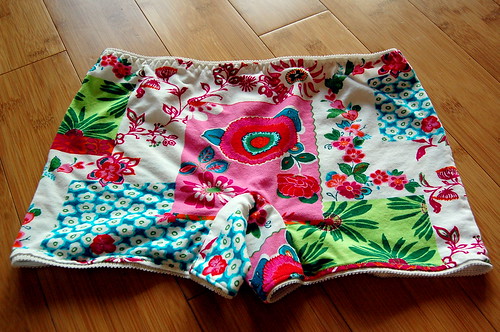
Grainger shirt from January, but every men's shirt I've reconstructed is different enough to present different options. This one was long enough to be a dress, unlike the Grainger, and I like the tent-y shape of this dress. So I added a couple of suggestions in the tutorial for other ways to finish the garment. I wanted to refashion one of the many plaid options in my men's dress shirt stash, but it is so much easier to see and photograph chalk lines on plain, light-colored fabric, so I chose this yellow oxford instead.

Finally, if you were to look at the Flickr set and read the intro on the set page, it has very specific verbiage about who and how I hope to help with this tutorial. Since you probably won't see it if you only look at the embedded slideshow above, I'm copying the most important part of the disclaimer here:

"This tutorial will be most helpful if you have at least an advanced beginner's sewing skills and vocabulary. I won't teach how to sew here, I am just sharing how I make these shirts in case you'd like to try your hand at it."

Thanks to all of you who requested this tutorial, and who read and offer your feedback and suggestions continually.  I appreciate you and all that you add to my creative life.  xoxo