

I made a couple of errors with the zig-zag quilt and the simple baby quilt that were driven more by procrastination than anything else. Determined not to make errors due to time / procrastination, I started this quilt a long, long time ago. I think I've taken about 4-5 months total with construction (as opposed to previous quilts, which I made in, oh, one weekend). I had to make it easy to sew a couple of quilt blocks here, in between projects, a couple there.
The concept of taking more time with this worked out beautifully, except then I encountered problems that could only happen *because* I was taking so long -- I would misplace fabric and end up buying another half-yard of something, and the colors would be slightly off because they were from different dye lots. Or I would buy two shades of green (kelly vs. hunter), decide which to use, then not pick it up for a month and be certain it was hunter green, until I'd sewn three quilt blocks, and then I'd go, dangit! Did I really mean to use kelly green?
I wanted to make a plus quilt. I started pinning all kinds of plus quilts over on Pinterest, and when I read the tutorials, I felt dread fall over me like a rain cloud -- some people were laying what seemed like thousands of tiny fabric squares all over their floors, and arranging them into a field of pluses! Such a beautiful outcome, and such tedious, mind-numbing work. If I tried that approach over 5 months, I would lose track of so many things. Just not realistic for me.
I turned to Google and found a couple other methods. One is on the cover of this book, and though I again love the outcome, it involves square AND rectangle piecing! No, thanks.
This gal, Aunty Cookie, had the most make-sense method for quick measuring, sewing, and piecing, but I still had to figure out exact dimensions. I love her quilt's charm. If I'd made it for myself, I might have eyeballed everything, too, and not measured. As it was to be a gift, I spent a few pages doing some calculations in my notebook to sort it all out. (So glad I paid attention in algebra and word problems in school. I knew that it would all pay off someday! :p)
Below is a how-to / tutorial in at-a-glance form. If you want to go through, one picture at a time, I created a plus quilt Flickr set here.
Let's get on with the show! This quilt is composed of 12 blocks, arranged 3 blocks x 4 blocks, and the finished quilt measures 45" x 60". Each quilt block is 15" x 15". In retrospect, I would make each block an inch smaller, and I'll tell you why later. For now, though I'll give you what I've got.
If you wanted to make this using scraps, it is a great way to use up those extra 8 inches of fabric (selvage to selvage) remaining from a previous project. If not, here's what to get at the fabric store:
SHOPPING LIST for the quilt top:
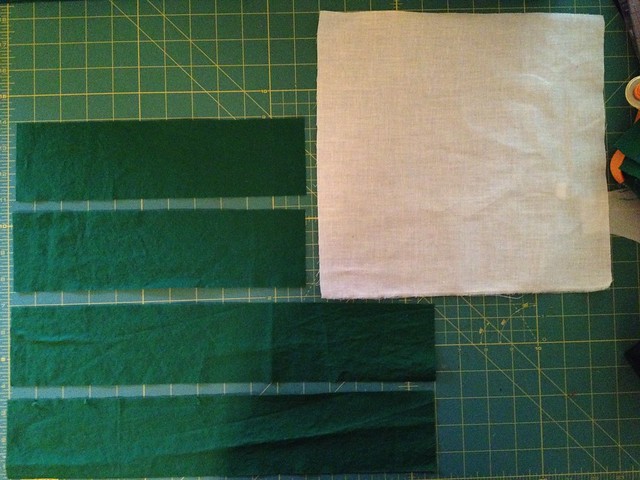
- I used four colors for this quilt, and bought a half yard of each. I cut them into 3" strips after washing and drying. A half yard is a bit of overkill -- it takes less -- but I find that some fabric store cutters are incredibly inaccurate, and what looks like 1/2 yard when they cut is a lot less because of crooked cutting (both by the previous cutter and the one who's helping you).
- I over bought the white, but if you were buying just to make this exact quilt, I'd suggest 1 1/2 yards.
Each quilt block is composed of:
- One 11" x 11" fabric square ( Fabric A - this will be the color around the plus - in my case, white)
- Two 3" x 11" contrasting fabric strips (Fabric B - this will be the fabric that is the plus)
- Two 3" x 16" contrasting fabric strips (Fabric B again - this will also be part of the plus)
Sew everything with the quilters' standard 1/4" seam allowance!
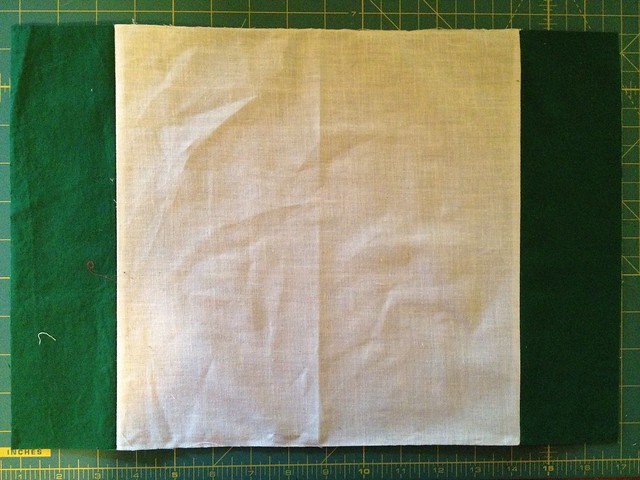
Take your Fabric A square, and sew an 11" strip of Fabric B on one side, and the other 11" strip of Fabric B to the opposite side. Press your seams open. It should look like this:
Now take one of the 16" strips and sew it on the adjacent (make) side of the square, and then sew the other 16" strip to the opposite side. Press your seams open. Your fabric square should now be bordered by the contrasting fabric on all sides, making a big square, like this:
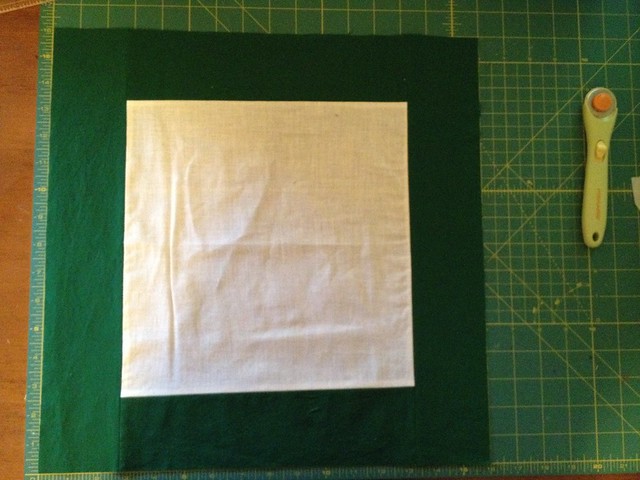
If you want to square up at this point, you can. The square should measure 16" x 16".
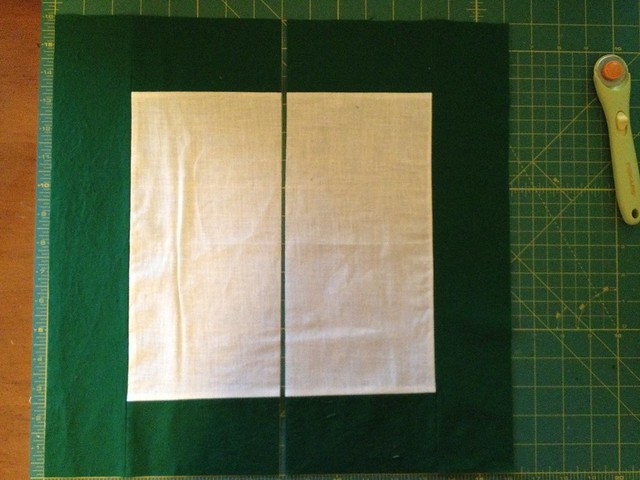
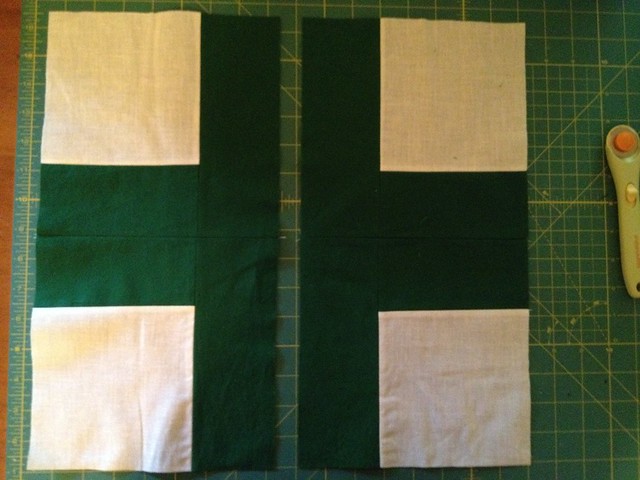
Now take your ruler and rotary cutter, and cut this square in half, making two rectangles:
Then cut each rectangle in half to make two squares:

Now you'll play a bit of musical chairs with your pieces. I was kind of picky about directionality of seams, so I took each piece and swapped it with its diagonal dance partner, so after you mix things up, you should have this:

I sewed the top and bottom of each side of the plus together first (and then press those seams!):
And then I sewed the two halves together:

Ta-da! Giant plus quilt block is complete! Square up again, if you like. This time, you should have a 15.5" x 15.5" block.

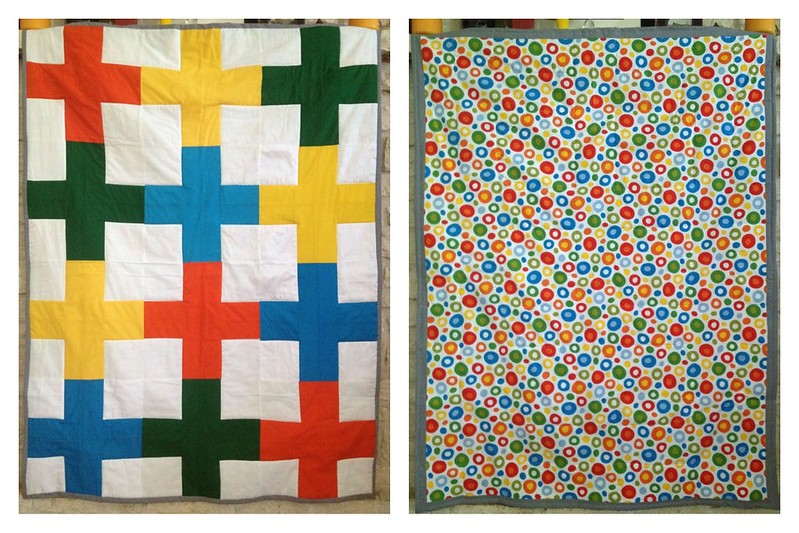
Took me a few tries to lay out the 12 quilt blocks in a way that looked best, and then I sewed them all together to make the quilt top. I went to my favorite independent fabric store in Austin (The Common Thread) to find fabric for the quilt back, and though it is a bit too matchy-matchy -- it was undeniably the very best choice for this quilt. It's from Robert Kaufman's Celebrate Seuss line. Soft, but 44" wide before washing and drying! An issue since my quilt top measured 45" and I wasn't going to trim it. (If I make this quilt again, I will recalculate everything to make 14" or 13" quilt blocks, methinks.)
I bought a yard of grey cotton for binding, so I cut these, on-grain, into 3" strips. I pieced them together and sewed strips of them onto the quilt back to extend its size. Made By Rae featured a "cheater quilt binding tutorial" that I remembered and thought would come in handy right about now. I was right -- I did it, and I was SO HAPPY with the way it all came out!
A couple more notes from a non-quilter about making this quilt: I bought a package of curved quilting safety pins, and I probably used 35 of them to "pin-baste" before quilting. It was SO WORTH the time. Everything in the final product looked better. I also decided not to quilt in straight lines across the quilt -- I opted to sew the squares of white, which helped to reduce those stress lines that show up in my quilts often. Not sure if you can tell from the photos of the quilt back, but this idea turned out great. If and when I sew another quilt, I'll be looking for ways to quilt like this.
And with that, quilt season is OVER! Back to the Olympics.........


WOW! That quilt looks GREAT!! So cute that the way the blocks are formed is by switching dance partners. :)
ReplyDeleteThank you, ma'am! Best part is that the mama-to-be loved it.
ReplyDeleteThat's a great quilt and will last well into the childhood years. How did that construction method work for you vs making it from single color squares?
ReplyDelete(opened in explorer, hopefully it will get along with blogger better than my preferred firefox)
It's possible that it ended up being more work, but I don't think so. It was more enjoyable than cutting and laying out a thousand tiny squares, that's for sure! :)
DeleteLove the quilt, and great tutorial! I have been loving the pluses too, but it hasn't motivated me to make a quilt yet... Maybe I should make a plus tote bag. :-)
ReplyDeleteGreat idea! A plus bag. Totally.
DeleteVery smart! one of these days I will tackle a quilt, but until then I guess I'll just admire yours. If you ask me, the slight color variations add to the charm.
ReplyDelete