Showing posts sorted by relevance for query undies. Sort by date Show all posts

09 September 2009

172. Wednesday Workshop: Bikini Undies to Boy Short Undies

People, I am not even kidding! This is part 3 of 3 in a comprehensive exploration of sewing your own undies. This weekend I saw another $7 escape my life forever as a pair of nylon boy short undies from Target bit the dust, after maybe 20 wears. Never ever ever again. That was $7 that could have bought a month's worth of coffee, or a matinee ticket to The September Issue or Coco Before Chanel, or 3 jars of Nutella, or a yard of decent fabric. I'm not buying undies anymore, mark my words.

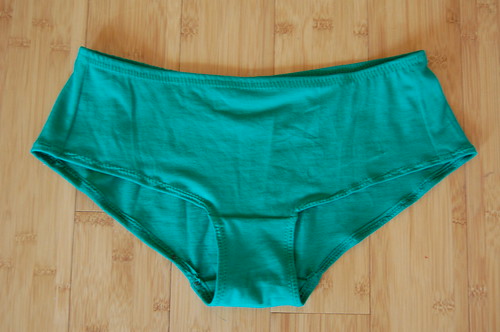
Here's my completed boy short version. You know I don't shy away from the colorful and bold when it comes to the undies:
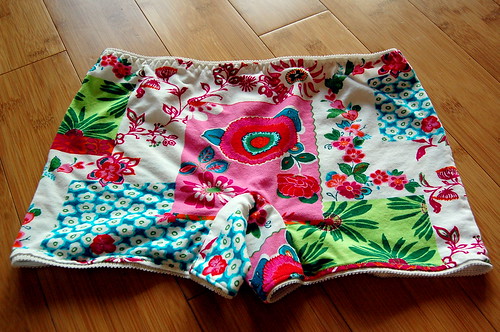

It has actually been 2 weeks since my last Wednesday Workshop post. Things were quite busy 2 weeks ago with my training work, and I couldn't get my head around converting those bikini pattern pieces into boy shorts. I knew it could work... just took me some time to get in the right mindset to figure it out. Here's the good news: it might take 30 minutes to draft the pattern, but if you've sewn up the bikini panties from two weeks ago, putting these boy shorts together will take 15 minutes. Here's the Flickr tutorial:


This concludes the undies workshops! A few notes after wearing the three prototypes:
  • I've tried elastic casing, sewing regular elastic right on the fabric, and sewing a lingerie elastic with a picot edge right on the fabric. The most comfortable so far, which happens to be the easiest to me, is the lingerie elastic with the picot edge. I used it on the boy short undies, it is very comfortable against the skin, and it has just the right amount of give and stretch. A package of this (enough for one pair of boy shorts) was $0.38 -- yes, 38 cents -- on sale, but at regular price was $1. Worth every penny.
  • I will try two more kinds of elastic on future undies: the legendary fold-over elastic, as suggested by Johanna Lu, and elastic lace, which I had a hard time finding locally. I think the elastic lace will do a better job of hiding pantylines. If you have worked with these or end up using these in an undies project of your own, please let me know what you think.
  • The hipster undies were originally sewn with the leg hems just turned under and sewn with a zigzag stitch. This did not wear well -- the leg openings (predictably) stretched with wear, and more than I was comfortable with. I will probably sew a 1/4" elastic on this pair. But hipsters are not my favorite style of undies to wear, so I doubt I will sew them again.
  • I suspect that you can draft the boy shorts pretty easily without converting a pattern. But I'll save that experiment some other time. I'm burned out for now exploring undies.
A Flickr user asked me how sewing your own undies is more economical. Let's calculate the cost of 10 pairs of undies I've bought in the last year, several of which are already falling apart, at an average of $6 per pair: $60. I can get 4 pairs of boy short undies (which use the most fabric of all types) from a yard of 60" wide cotton jersey. Let's say that runs $6 a yard, so for 2 1/2 yards I'd pay $15. Plus 10 packages of elastic for a total of $10. Including a spool of thread for $2, that brings my monetary investment in self-made undies to $27 for the same 10 pair.

What about the time investment? I've invested about an hour of pattern drafting time and 15 minutes per pair of undies, for a 3 1/2 hour total time investment. When I purchased the last 10 pairs of undies, I probably spent more than 3 1/2 hours hemming and hawing over how much longer I could use the tattered and torn undies I had, driving to the store, trying them on over my undies in the dressing room, thinking about how poorly some fit or how uncomfortable they were while I was wearing them, and dropping to the ground to curse the heavens when some of them started falling apart within a year.

So the undies are done and it's time for a new project! Any ideas for upcoming Wednesday Workshops? I have a short list of experimental DIY kinds of projects, but am open to suggestions. :)

26 August 2009

170. Wednesday Workshop: Bikini Undies to Hipster Undies

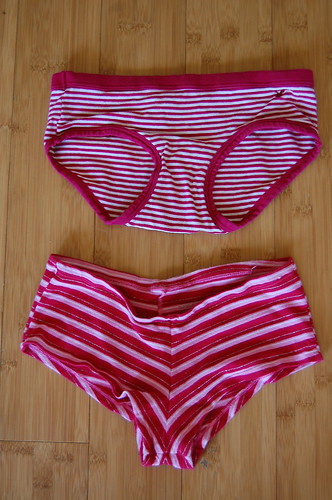
Last week, Gattolina responded to my Wednesday Workshop tweet/ post on copying your own undies. The pair I chose were bikini-style undies and she asked for suggestions for hipster or boy short-style undies. So I decided to try converting the bikini undies pattern to hipster panties. The short story is that is was very simple to do. The longer story is that so much depends on your style, preferences, etc. I grabbed two pairs of hipster-ish undies to study them more closely:

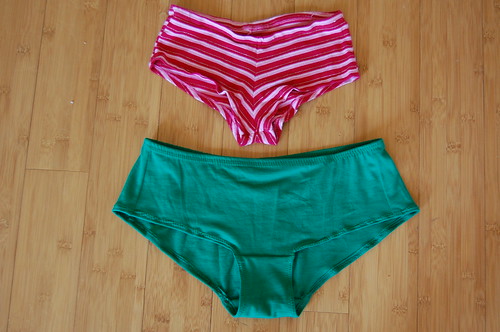
The top pair are from AE, and they are probably a size too small. They are more bikini than hipster, but the leg openings offer much more coverage than a bikini. The waistband and legbands are elasticized, and the casings are sewn from a coordinating solid knit. The bottom pair are from Target. I think the center front and center back seam are a big mistake, though they obvz do lend some, well, definition between the cheeks. There is no elastic at the waist or in the legs -- the raw edge was turned in and coverstitched.

Two extra notes: From a design perspective, the leg openings on hipsters are much lower than on bikinis. And these undies are made of 94% cotton, 6% spandex, which have so much more stretch than 100% cotton jersey that they are tiny and have negative ease. I worked with the remains of the kelly green t-shirt from last week's Wednesday Workshop, so here's how to modify the bikini pattern without adjusting for negative ease:

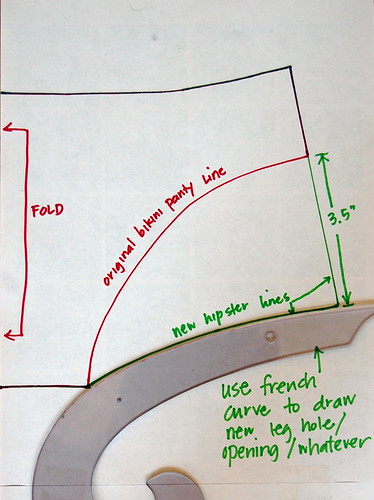
I decided to lengthen the side seam for a total length (incl. seam allowances) of 5". I suspect this will be longer for taller folks. Then I used my french curve ruler to connect the bottom of the new side seam with the point where the panty front will meet the crotch piece.


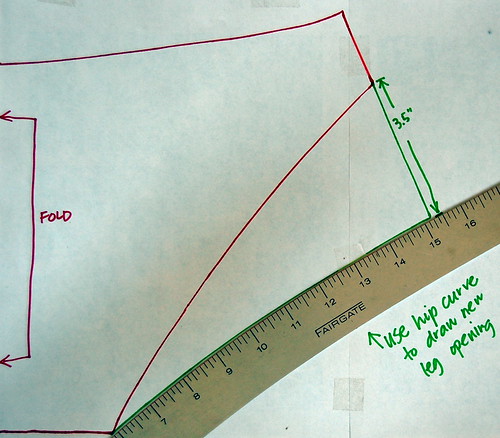
Then I lengthened the side seam on the panty back to the same 5" as I did on the front. I drew a line connecting the bottom of the side seam to the bottom of the pattern piece using my hip curve.


And I sewed the waistband with elastic and did a simple hem at the legs.


Original vs. new DIY pair. I know the new ones look huge, but they do fit. Not sure about the non-elasticized leg openings though. I'll test them out and let you know. I also don't have any shirts to cut up that are knit w/ spandex but I'd like to modify the pattern with negative ease and a stretchy fabric to see if they are more comfortable, etc. Stay tuned for the next Wednesday Workshop....


30 May 2012

220. My first handmade swimsuit! KwikSew 3779

Today was the perfect day for an adventure: a swimsuit-sewing kind of adventure!  I've sewn some undies, and figured it couldn't be too much more difficult to sew a swimsuit.  Good news is that I was right about that.  :)

It took me at least 2 years to do this because...

  • I'd spent so much on store-bought suits and felt that, even though they weren't the best fit and style for me, I wanted to feel I'd gotten my money's worth by wearing them more... 
  • I couldn't find a great current pattern... 
  • Of vintage swimsuit patterns, many of the styles I loved were made for woven fabrics, back in the days when you wore a swimsuit to lounge, not to swim...
  • Sometimes I have so many things I want to sew that I don't know where to begin!  The swimsuit never made it to the top of the queue.
Why today?  First pool party of the season!  If that isn't motivation, I don't know what is!!!!